
Create an H2 model with the FreeForma in 5 easy steps
The H2 orthosis is used to treat a wide range of pathologies affecting the carpometacarpal (CMC) and metacarpophalangeal (MCP) joint of the thumb: acute arthritis flare-up, arthroplasty, basal thumb arthritis, De Quervain's syndrome, gamekeeper's thumb, osseous contusions, rheumatoid arthritis, subluxation, synovitis, tendonitis, and tendinosis to name a few.
If it's your first time using the FreeForma to create an orthosis, we recommend reading this article first, where we explain all steps of modeling an orthosis with the FreeForma in detail.
We will quickly go over the following steps, in preparation for modeling the H2 orthosis:
- Selecting the H2 model
- Measuring the thumb
- 3D scanning the limb
- Rectifying the 3D scan
- Modeling the orthosis
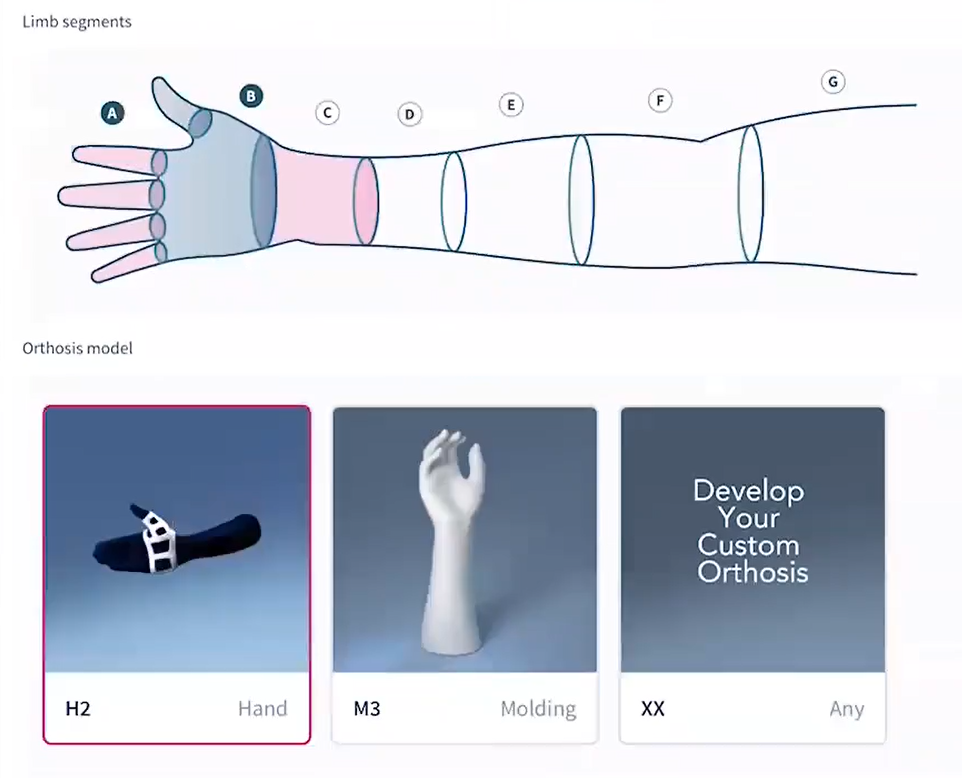
Step 1: Select the H2 model
|
On either the right or left upper limb, select the metacarpal region and the thumb. The H2 orthosis will be the first suggested model. Select the model and click next. If you select the model without taping on the thumb this will lead to an H2 model which is the same model but without the thumb included. |
 |
Step 2: Measuring the thumb
|
When choosing an orthosis where the thumb will be immobilized, we advise adding the exact circumference of the patient's thumb. This can be added to the measurement sheet. Keep in mind that the measurement must be taken in 'mm'! Measurements of the thumb should be taken loosely around the interphalangeal joint to make sure the IP joint will fit easily and not strain. |
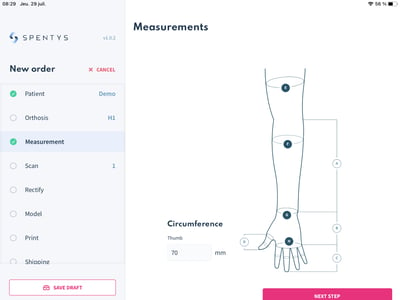 |
Tip: You can also use a ring measurement tool (ring sizer) to get the exact measurement of the circumference.
Step 3: 3D scan the limb
To achieve a perfect scan for this particular model, put the hand and thumb of the patient in a
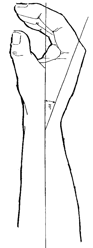
relaxed/resting position, meaning:
- Dorsiflexion of the wrist between 12°-20°.
- The IP slightly flexed.
- the thumb in partial opposition and facing forward.
 Tip: Ask the patient to keep their arm vertically at a 90° angle. Ideally, the patient can let it rest on the back of a chair or any other object you can easily walk around.
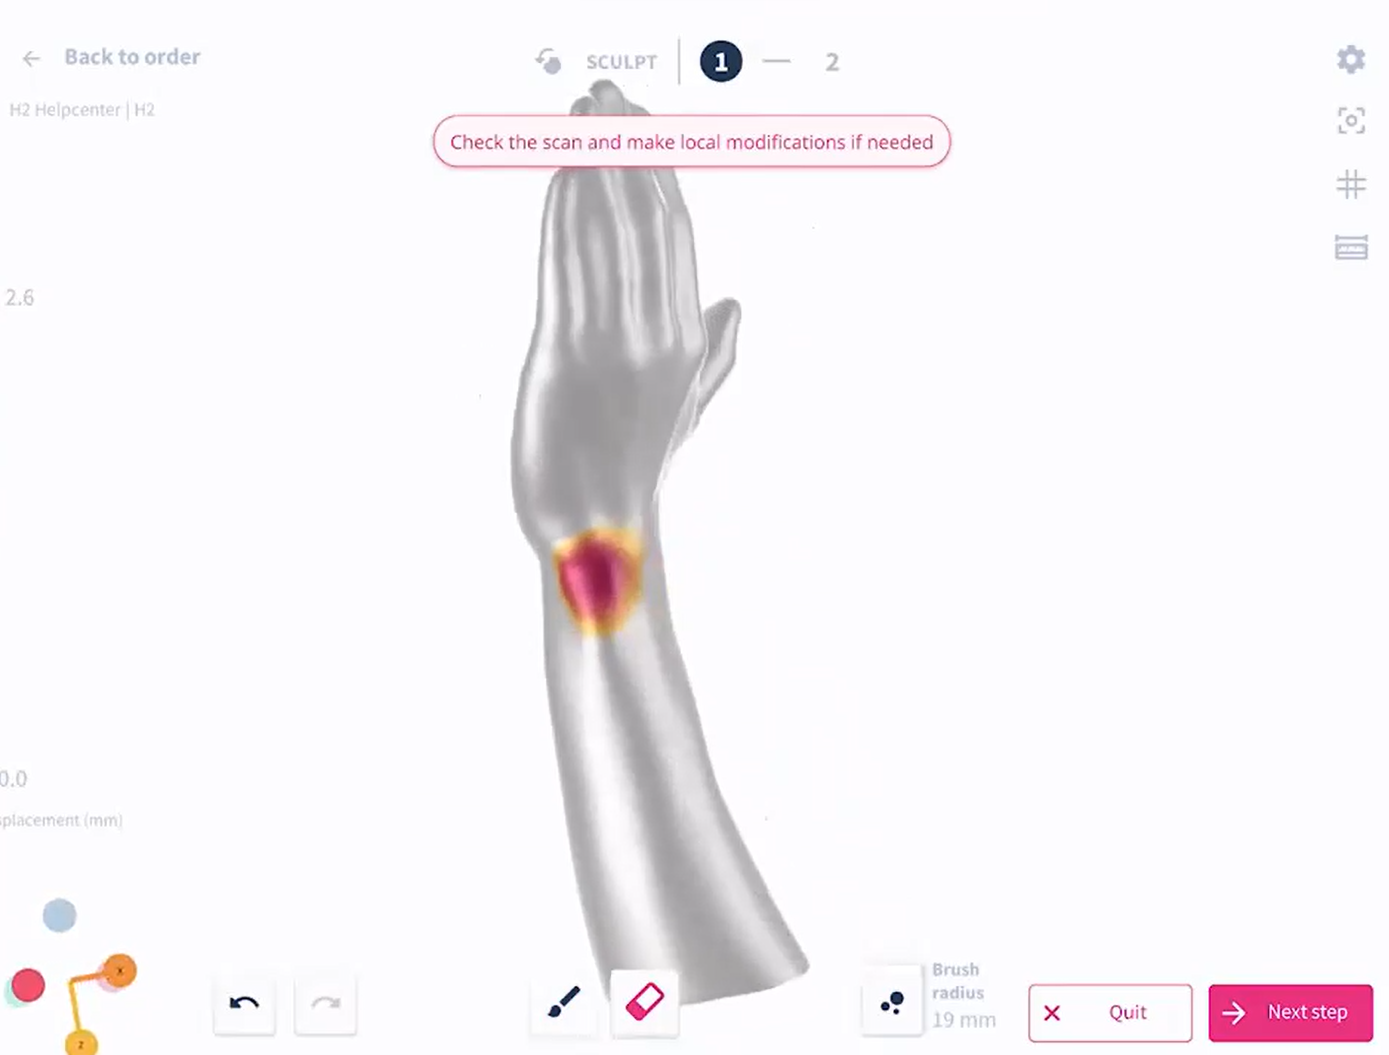
Step 4: rectify the 3D scan
To create perfect-fitting orthoses, it's recommended to start by rectifying the scan. By doing so, you set it up for a smooth modeling experience. Rectifying the scan consists of the following easy steps:
- Cleaning up the scan. If there are irregularities or even missing pieces to the scan, you can use our tool to enhance the scan.
- Changing the pose of the scan. This comes in handy when you could not scan the limb in the right immobilization position. There is an entire article on the rectification of the wrist here.
- Correcting the dimensions of the thumb to make sure they are an exact copy of the patient's thumb. Check out this article for a step-by-step tutorial.
Adding some volume on the scan will allow you to have the possibility to add, at a later point, padding/foam to the splint and make it more comfortable to wear for the patient.
Here is an article that explains all the steps in more detail.
Step 5: 3D model your H2 orthosis
Using the FreeForma tool you can now design the H2 orthosis.
1. Create the shape of the orthosis by drawing on the scan with one finger.
|
|
2. Decide on the local and overall thickness of the orthosis
You can adapt the thickness in some regions, depending on your patient's needs. For example, you can add more thickness to the MCP region of the thumb to make sure that part of the orthosis is rigid enough to immobilize the thumb.
| 3. Add a closing system to your design. For a more detailed description of how to add beltloops, click here.
4. You can now engrave a serial number on your design. Just tap on Text Engrave and tap another time on your splint to make your order number appear. You can then move this serial number on the orthosis by sliding it with your finger and repositioning it using the two rotation arrows. |
 |
Step 6: Export
Congratulations, you have just successfully created an H2 orthosis. You can now export the file and print the orthosis.