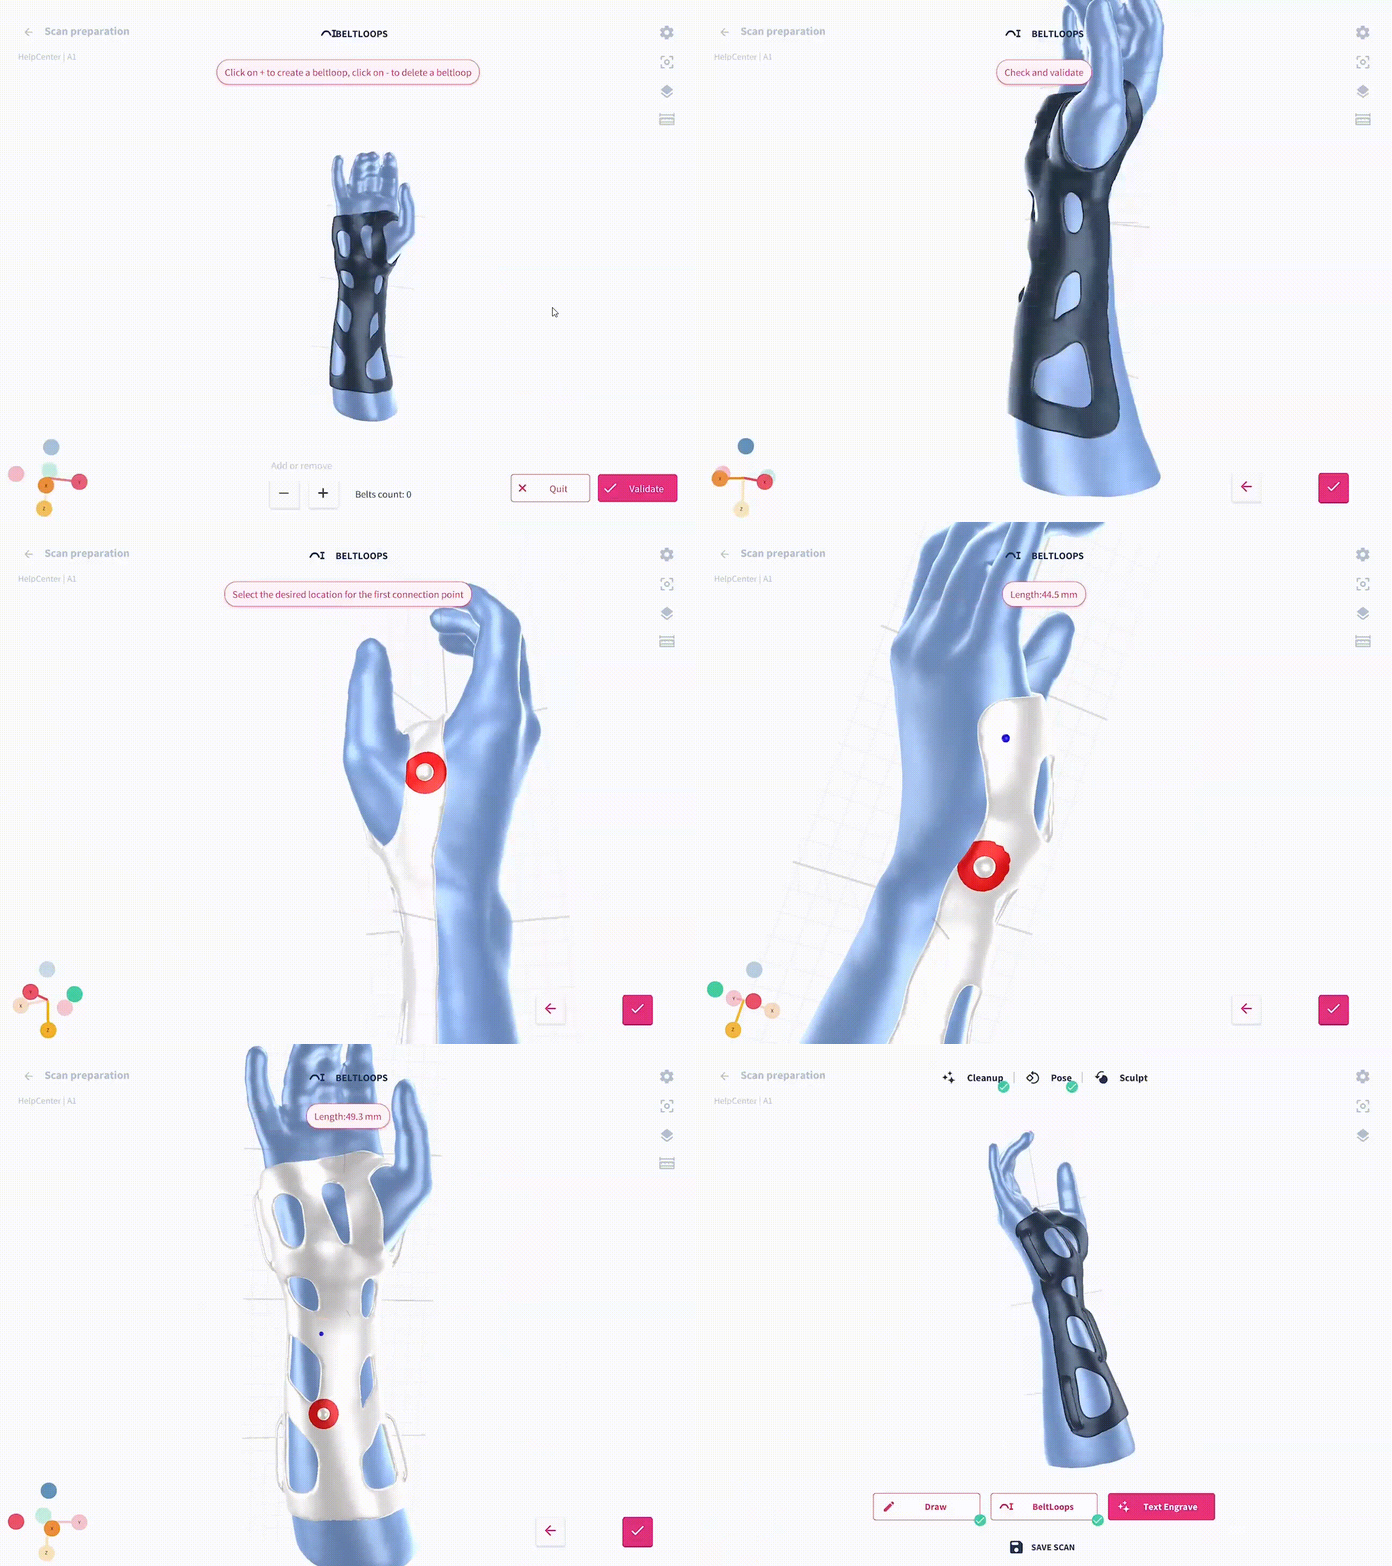
Creating beltloops allows you to add a closing system to the orthosis.
Congratulations, you just drew and designed your orthosis in FreeForma.
The next step will be creating the beltloops. Creating beltloops allows you to add a closing system to the orthosis. We use Velcro straps and a 3D printed closing system, but you can also use your own straps.
Creating a new beltloop
- Click on “+” if you wish to add a beltloop
To create a new beltloop, you must indicate the two points that will attach the beltloop to the model. You can first select the desired location for the first connection point and then select the location for the second connection point.
The circle around the dot indicates a margin that we recommend between the point and the edge of the model so that there is enough room to merge the beltloop with the orthosis.

The moment the second point is selected, at the top of your screen there will appear an indication on the total length of the created beltloop. Keep the width of your straps in mind. Make sure the beltloop is long enough to let the strap pass through easily. E.g., if the width of the strap you’re using is 30mm, make the length of the loop 35mm.
If you’re satisfied with the placement of the loop, you can now also change the width, the thickness, and the clearance of the beltloop with the sliders at the bottom of the screen.
Keep in mind: when changing the thickness of the created loop, the set length will decrease when increasing the thickness. So pre-set a longer beltloop when you know you’re going to increase the thickness of the loop.
If you will be using the blue Velcro’s provided by Spentys, we recommend the following settings:
- Minimum length of 35mm.
- Minimum thickness of 5mm.
- Minimum clearance of 4mm on a flat surface. Is the surface is curved, the clearance must be more than 4mm.
If you wish to remove the last added belt, click on “-“.
When creating beltloops try to avoid putting any strap over the joints of the limb. This can cause serious irritation for the patient.
