The rectification tool lets you modify the scan in order to better adapt it to your patient’s characteristics and pathology. In this article, we will focus on the rectification of the thumb.
After creating a new scan, you can rectify the scan. If it is your first time using the app and the first time you will try to rectify a scan, we recommend reading this article first where we explain all the steps and tools in more detail.
Step 1: Clean-up and add landmarks
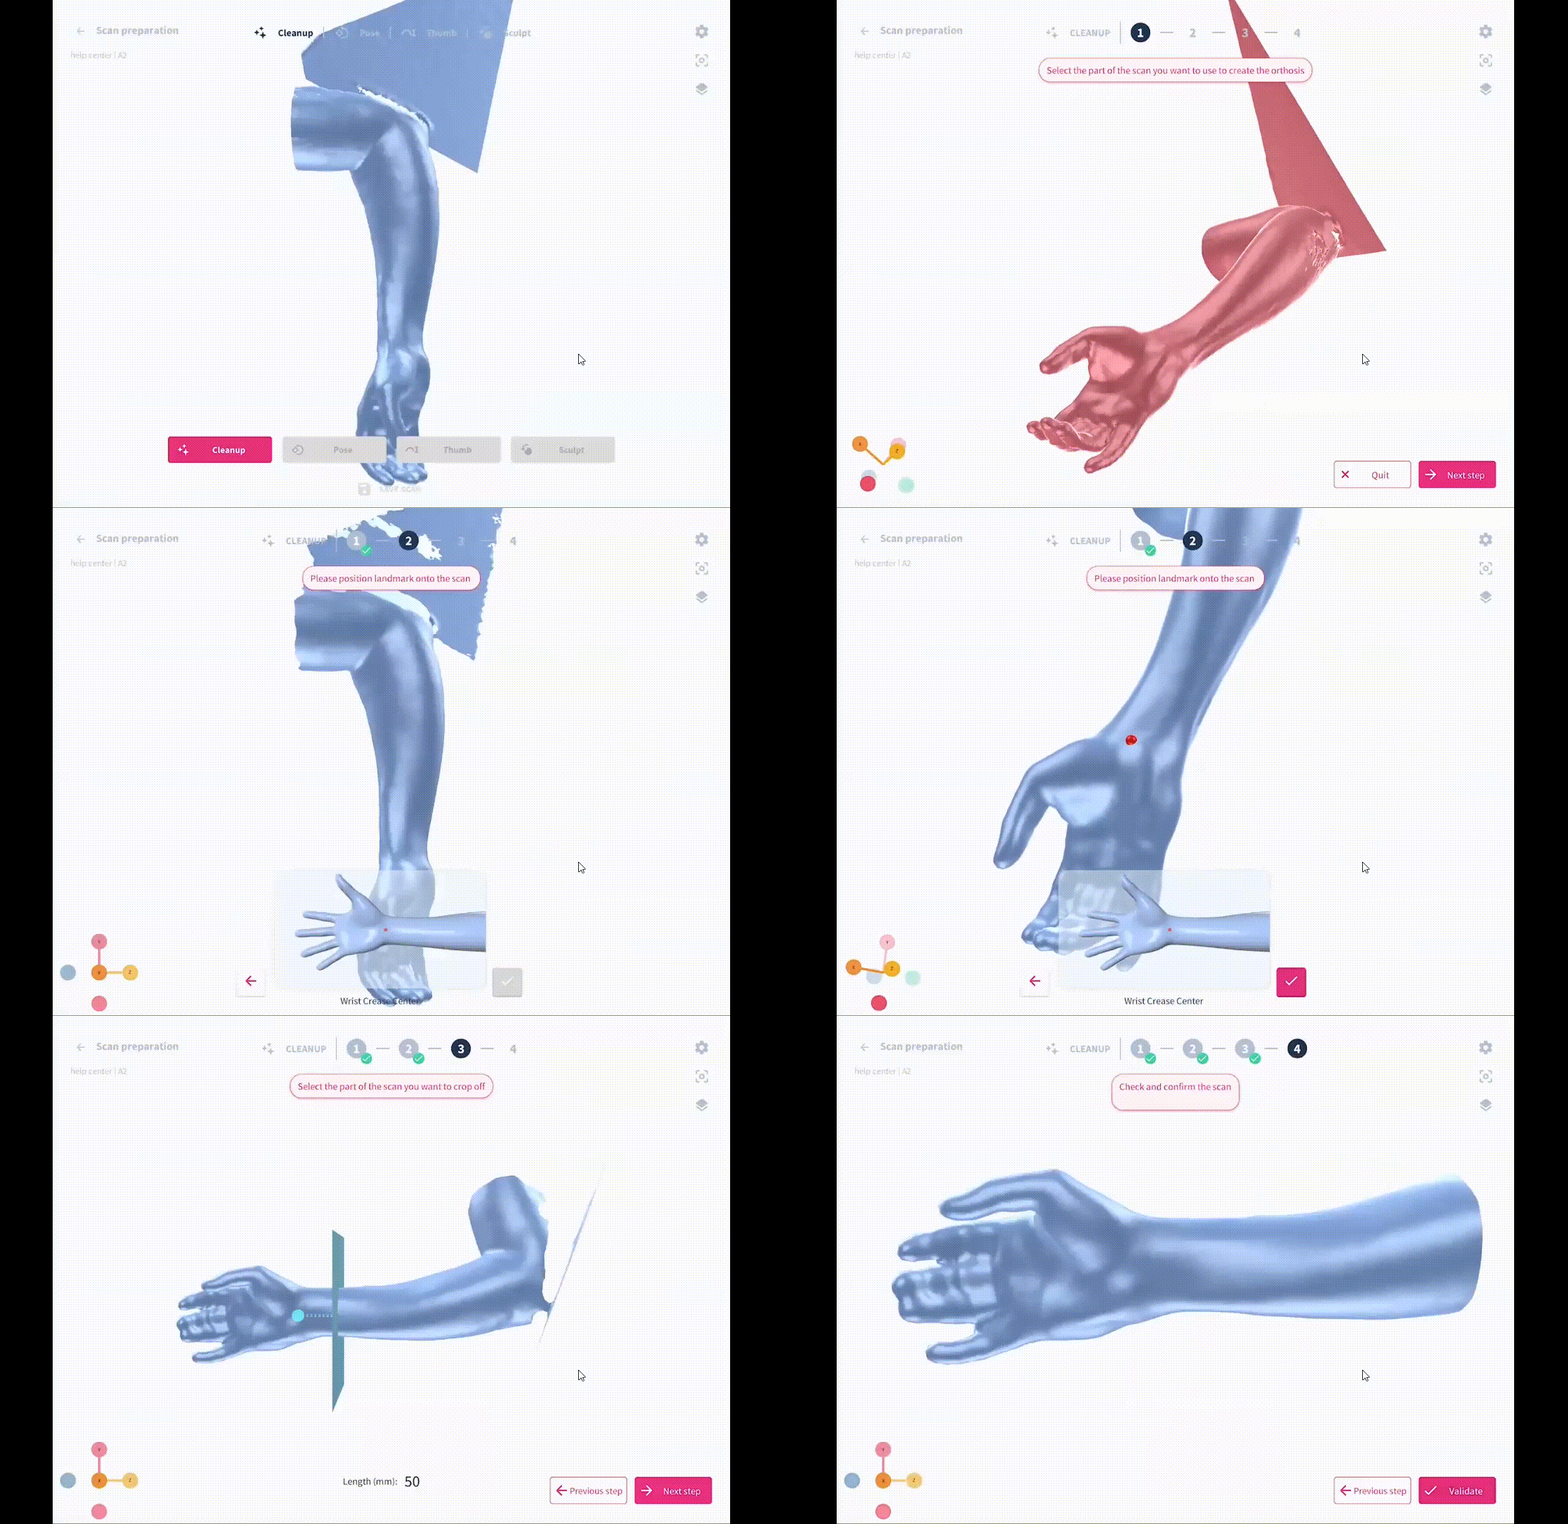
The first step of the rectification process is to automatically smooth out the scan and fill up missing spots if needed.
The part you want to use will be colored green. Select the part you want to use to create the orthosis. If it’s red, then it has not been selected.
Next, you should position landmark points. A reference model in the lower middle part of your screen indicates precisely where you should put the landmark points.
Now, select the part of the scan you want to crop off. The part colored in dark blue will be cut off. This leaves the light blue part of the limb to create an orthosis.

Step 2: Positioning
The next step is Pose. Here you can change the position of the scan. Here you will find a full description of how to position the wrist.
Next, you can correct the dimensions of the thumb to make sure they are an exact copy of the patient's thumb.
Before you can start the modifications, our application will ask you to add some extra landmarks on the thumb. Add the first one at the top of the thumb, the second one on the interphalangeal joint (IP), and finally, the last one on the metacarpophalangeal joint (MCP). The position of these points needs to be very accurate, use the reference model at the bottom of the screen. 
There are three possible modifications to change the dimensions of the thumb. The modifications take place between the IP landmark and the MCP landmark.
- Circumference: change the pre-set (the measurement you set at the beginning of your order) circumference over the length between the landmarks.
- Length: change the distance between the landmarks
- Position: reposition the area (volume/distance/length along the axis created between the landmarks) where the modifications are due.
When making modifications, make sure that the base of the thumb is at least the same size as the widest part of the thumb. If not this could result in a misfit.
The last step of the rectification is to locally sculpt parts of the scan to add or remove volume, creating or removing pressure points. If you want to create extra pressure at the thenar, you can define the area you want to put the extra pressure by clicking on sculpt and creating pressure by displacing the area negatively.

Adding some volume to the model will allow you to have the possibility to add, at a later point, padding/foam to the splint and make it more comfortable to wear for the patient.
Click here for a more detailed description of how to sculpt.
