
An abnormal flexion pattern of muscle activity can present itself and affect the upper limb(flexion at the elbow, flexion at the wrist, flexion at the fingers).
A part of the treatment of spasticity is the usage of splints/orthoses. The orthosis will open the hand and stretch the contracted muscles to create a more functional position of the fingers/hand and wrist. Our Q models can provide the correct treatment for the mentioned symptoms. At Spentys the Q2 model (see picture) is the most requested model to treat spasticity.
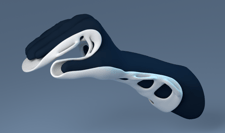
The Q2 will provide ventral and palmar support for the forearm, hand, and fingers in a POSI position.
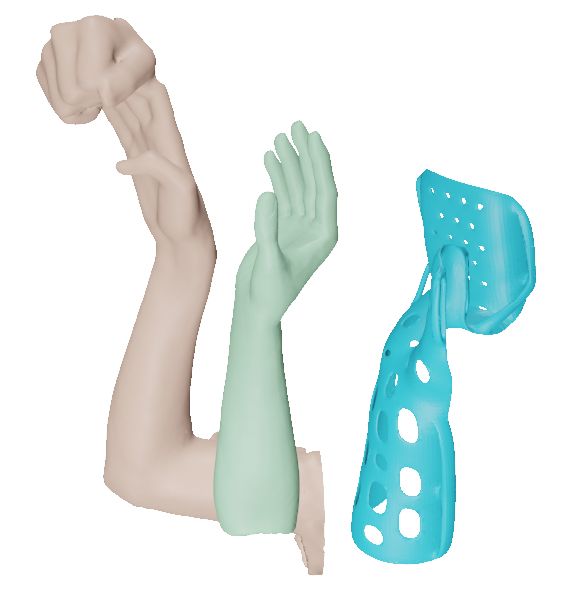 |
In this article, we will share tips and tricks on how to take a scan of a patient with spasticity for 3D printing. The main advantage of the digital workflow is that thanks to patient measurements, we are able to digitally re-create the patient's limb and move it to the perfect position |
To begin this tutorial, feel free to read the basic tutorial for performing a scan that you can find via this link.
|
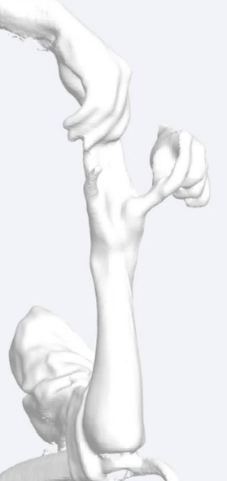
A spastic patient will never be able to hold a good position to take a good scan. Several solutions are available to you: - Scan the opposite limb if it is not spastic and make a mirror if the dimensions are the same - Take a scan of a resin cast with uniform thickness - Take a scan of a corrected plaster positive - Take a "bad" scan and inform the designers of all the measurements of the limb via the "measurements" section of the application. For the last technique, you may need to be at least two people to take a good "bad" scan: one holding the patient and the other one scanning. |
 |
Before making the scan. You will be asked to fill out a measurement sheet so that we can digitally re-create the limb:
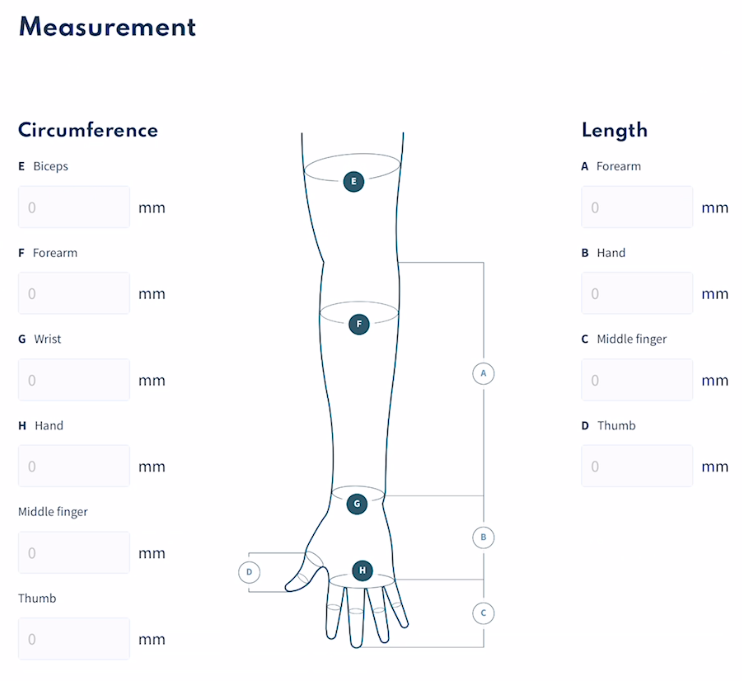
For that, we have to align on the emplacement you take those measurements, they have to be in the same place the designer will modify the virtual limb, Please read the following instructions carefully:
|
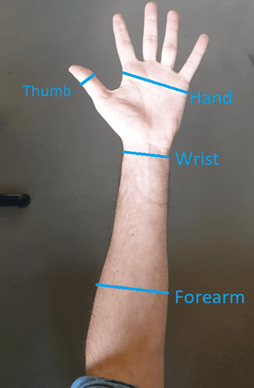
· Hand circumference: Take it under the metacarpal heads · Thumb circumference: Take it at the IPP · Wrist circumference Following the joint · Forearm circumference At the larger point of the forearm |
 |
|
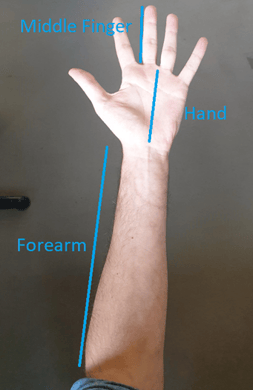
· Middle finger From MCP to the tip of the middle finger · Hand From wrist to middle finger MCP · Forearm From elbow to wrist |
 |
|
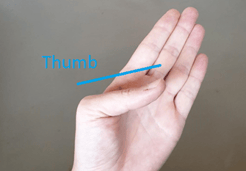
· The thumb length is measured from MCP to the tip of the thumb |
 |
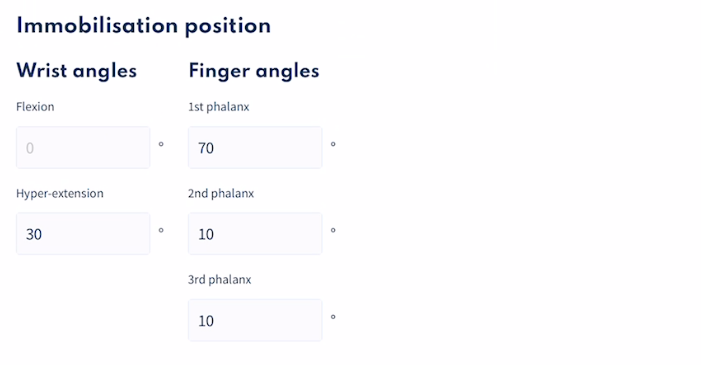
Once all the measurement information has been entered, you will then need to fill in the angulation information to correct the limb:
Printer and materials
At Spentys, we recommend printing the Q2 model using a sturdier material (semi-rigid to rigid). The material needs to prevent the fingers, hand, and wrist from going back to a flexed position, and the material needs to be firm enough to keep the limb in a more functional position.
FDM-PP has semi-flexible, fatigue-resistant, chemical-resistant, and thermoformable properties. These properties provide support to the wrist and hand and will be firm enough to give a prolonged stretch to the spastic muscles.
The following settings are recommended when printing the Q2 model in FDM-PP:
- Manage the size of the alveoli: By managing the size of the alveoli in the hand region, we can create a more firm base for orthosis. Creating smaller alveoli in size in the hand region, the orthosis will be less flexible and will be more able to keep the hand in the correct position. Alveoli at the wrist and arm can be the usual size.
- Opt for a global thickness of 4mm in treating adults. When treating children, a global thickness of 3mm should be enough.
MJF-PA11 is a bio-derived powder and has high toughness, high ductility, and impact strength as properties. Also, PA11 has an outstanding level of thermal, chemical, and impact resistance over a wide range of flexibility.
Because of these properties, MJF-PA11 can be used as a material and printing technique for a more dynamic Q2 orthosis, whereas FDM-PP will be more used to create a static orthosis. MJF-PA11 will be more flexible but has high durability and high elongation at break.
The same settings as FDM-PP are recommended when printing with MJF-PA11.
That's it! You now understand how to handle your spastic patients to get the best results for a 3D orthosis 😊