
Create an A1 model with the FreeForma tool in 5 easy steps.
The A1 orthosis is commonly used for non-/pre-/post-surgery treatment and suitable to treat a wide range of pathologies affecting the radio-carpal and the carpometacarpal joint of the hand and wrist: scaphoid fractures, radius fractures, acute arthritis flare-ups, acute TFCC ligament injuries, arthroplasty, contractures, complex regional pain syndrome, and osseous contusions. It’s also suitable in the case of radial nerve paralysis, rheumatoid arthritis, synovitis, (sub)luxation, as well as wrist strain, tendinitis, tendinosis, and wrist sprain to name a few.
If its’ your first time using the FreeForma to create an orthosis, we recommend reading this article first, where we explain all steps of modeling an orthosis with the FreeForma in detail.
- Select the A1 model
- 3D scan the limb
- Rectify the scan
- Model the A1 orthosis
Step 1: Select the A1 model
| On either the right or left upper limb, select the metacarpal region and parts of the forearm that interact with the orthosis. The A1 orthosis will be the first suggested model. Select the model and click next. |  |
Step 2: 3D scan the limb
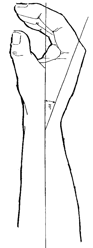
To achieve a perfect scan for this particular model, put the hand and thumb of
the patient in a relaxed/resting position, meaning:
- Dorsiflexion of the wrist between 12°-20°.
- The IP slightly flexed.
- the thumb in partial opposition and facing forward.

Tip: Ask the patient to keep their arm vertically at a 90° angle. Ideally, the patient can let it rest on the back of a chair or any other object you can easily walk around.
Step 3: rectify the 3D scan
To create perfect-fitting orthoses, it’s recommended to start by rectifying the scan. By doing so you set it up for a smooth modeling experience. Rectifying the scan consists of the following easy steps:
- Cleaning up the scan. If there are irregularities or even missing pieces to the scan, you can use our tool to enhance the scan.
- Change the pose of the scan. This comes in handy when you could not scan the body part in the right immobilization position.
- Locally sculpt parts of the scan to add or remove volume, creating or removing pressure points.
To have a more in-depth description of the process of rectification, we recommend reading our article: ‘How to rectify the wrist’, where we fully describe how to rectify a scan.
Step 4: 3D model your A1 orthosis
Using the FreeForma tool you can now design the A1 orthosis.
Designing the overall shape
Create the shape of the orthosis by drawing on the scan with one finger.
|
 |
Designing the opening
Depending on the material you will use, the opening of the orthosis (to fit your wrist and arm) can differ.
- Using sturdier material, the opening should be bigger to fit the arm more easily in the orthosis. It will also be more difficult to aid the patient with putting it on by wringing the orthosis open.
-
Using flexible material, the sides can be closer together as it will be easier to flex the orthosis and insert the limb.
Tip: When creating a more closed opening, using flexible material, be sure to have at least an opening of approximately 20 mm.
Designing the inside structure
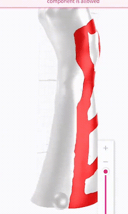
When creating alveoli, it’s best to stretch them vertically. Horizontally wide alveoli are harder for the printing process as printing will be done vertically (with FDM and DLP). To clear large horizontal gaps you need more support which ultimately leads to more waste, more costs, and long printing times. Those are three good reasons to use vertically stretched alveoli (see picture below).
 |
 |
Adapt the thickness
Decide on the local and overall thickness of the orthosis.
- You can adapt the thickness in some regions, depending on your patient’s needs. For example, you can add more thickness to the wrist which leads to extra support and rigidity.
Add a closing system to your design
For a more detailed description of how to add beltloops, click here.
When creating beltloops for a wrist orthosis, try to avoid putting any straps over the joint of the wrist.
Engrave the serial number
You can now engrave a serial number on your design. Just tap on Text Engrave and tap another time on your splint to make your order number appear. You can then move this serial number on the orthosis by sliding it with your finger and repositioning it using the two rotation arrows.
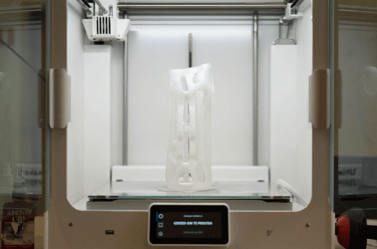
Step 5: export
Congratulations, you have successfully created an A1 orthosis. You can now export and print it.