
Position 1 - Neutral position
A neutral position of the wrist is mainly suggested when the patient shows a fracture of any kind (radial, ulnar, wrist). The orthosis gives rigid support and immobilize the wrist. This helps with a better and faster healing of the fracture and a better alignment of broken bones.
|
 |
Position 2 - Resting position
Depending on the indication, the resting orthosis will be worn during the day and/or night. The aim of a resting orthosis is:
- Reduce pain, infection, oedema
- Increase recovery/healing
- Prevent deformations
- Prevent muscle stretching
Some indications are:
- Rheumatoid arthritis
- Arthrosis
- Wrist sprain
|
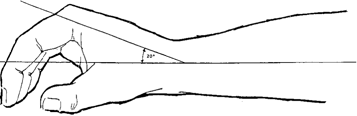 |
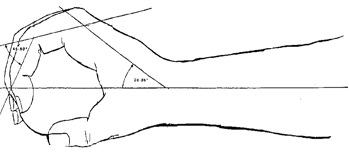
Position 3 - Functional position
The functional position is the position the hand and wrist will take to easily grab an object, for example a water bottle.
The position is used in situations where functional movement and use of the wrist is permitted.
 |
|
Position 4 - Thumb opposition
|
When you are integrating the thumb in the orthosis, for the H1 model for example. It is recommended to have the thumb slightly opposed, so the patient is still able to hold a pen (precision grip). Indication e.g., osteoarthritis of the base of the thumb. To make sure this is possible, you can instruct your patient to imitate holding a pencil between thumb and finger (make a circle with the thumb and pointer finger) when taking the scan. |
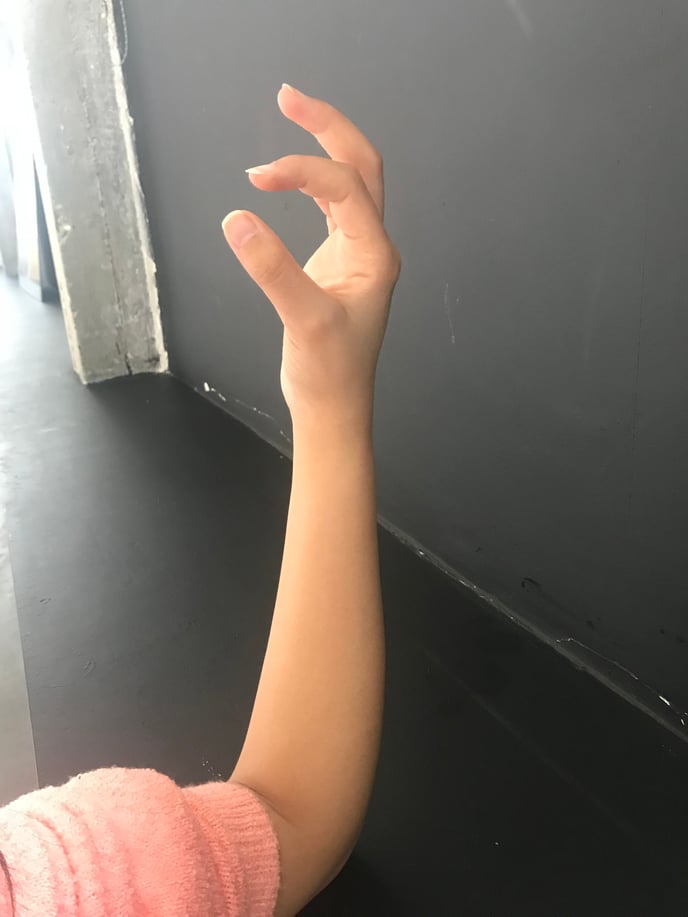 |
Note: When you work with a Spentys designer, it is recommended to leave a small gap between the pointer finger and the thumb, and hence leaving a small opening in the circle so that our algorithms detect the right length of the fingers.Or you can let the patient hold a pencil while taking the scan. The Spentys designer will be able to remove the pencil from the scan and will be able to work on the scan afterwards.
This position of the thumb can also be combined with the three positions previously described above.
Tip: Ask the patient to keep their arm vertically at a 90° angle. Ideally, the patient can let their arm rest on the back of a chair, a table or any other object you can easily walk around.