
Turn on the iPad and open the Spentys application. If the application is not installed yet, you can install it directly from the App Store or through this link. Log in with your credentials or create a new account.
In portrait mode, you can slide your finger from the edge of the screen to the center of the screen to open the main menu. Nevertheless, we recommend using the app in landscape mode so that the menu is visible at all times.
Home screen
Here you can scroll through all the orthoses you've created.
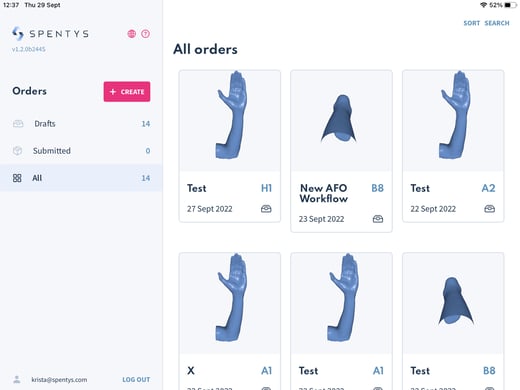
- Drafts: all the orthoses you haven’t submitted yet are stored. If you want to stop working on a new order and continue later, this is where you will find it.
- Submitted: all the orthoses you have completed are stored. These are also available on the Spentys platform where you get access to even more information on the medical device.
- All: Shows all orthoses you have created from both the drafts and submitted groups
- Sort: this allows you to sort the orders by date or by product code and can be found in the top right corner of the screen.
- Search. Allows you to look for a specific orthosis previously used or created and can be found on the top right corner of the screen
Create new order
To create a new orthosis, push the pink Create New button.
By clicking on Create New, a New Order page opens, consisting of a guided workflow that takes you through a step-by-step process to create a new orthosis. If you are not able to complete all steps during the patient consultation, you can save your order as a draft by clicking on the Save Draft button at the bottom left of the screen.
Once you have completed a step, push the pink Next Step button or select the next step in the overview on the left side of your screen. You will notice that, once a step is completed, it will be check-marked in green.
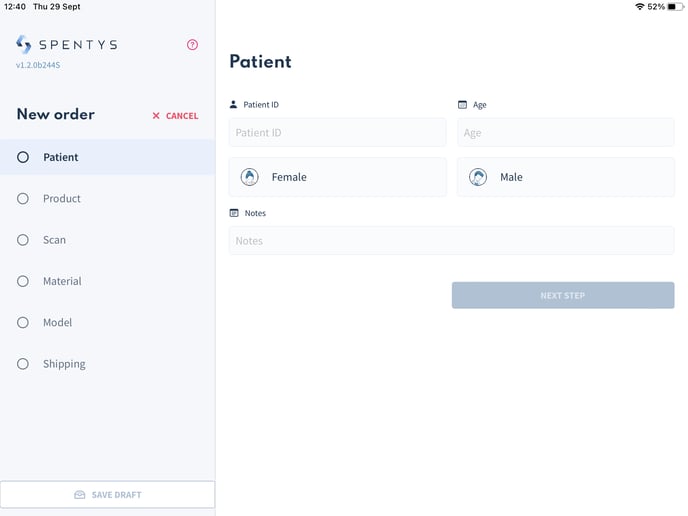
Step 1: patient
Fill in the patient's information:
- Patient ID, use codes to anonymize patient data.
- Age & sex.
- Notes, which can be used to provide more information on the patient or pathology you find pertinent.
Step 2: select the orthosis
First, choose the body part you wish to scan. In case the limb requiring an orthosis is not scannable (e.g. injury, wound, shivers,..) it is possible to scan the opposite limb and mirror it. You can do so by selecting ‘No’.
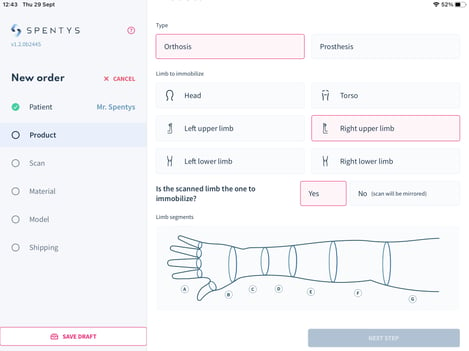
When you choose the lower or upper extremities a model of the limb will appear where you can select the different segments that the orthosis should support. Depending on the selected segments, different AFO models will be suggested. In case you don’t see the reference model from the catalog appear as an option, double-check if you have selected all regions of the limb that interact with the orthosis.
Now select the model you want to create.
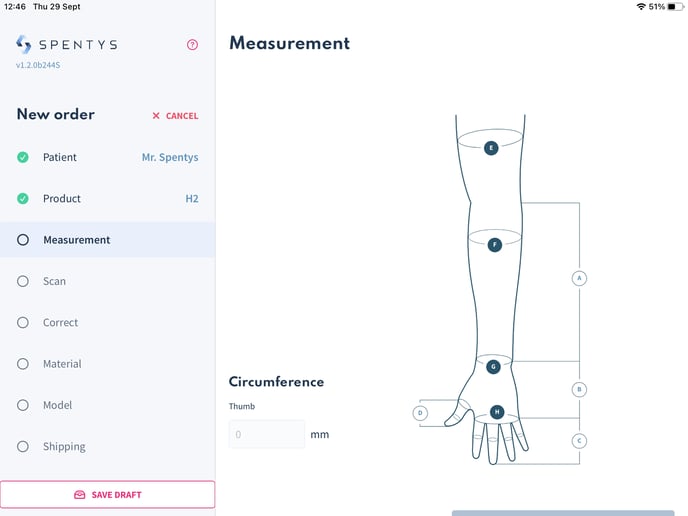
Step 2bis: Fill in the measurement sheet
Some models require one extra step where you add manually measured parts of the body. E.g. in models where you want to immobilize the thumb, you add the exact circumference of the patient's thumb.
Step 3: 3D scanning the limb
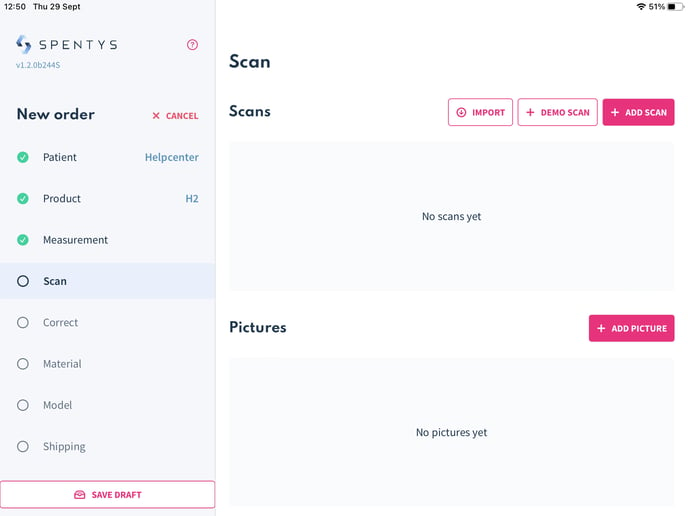
In order to add your patient’s scan, push the Add scan button. Make sure the scanner is plugged into your iPad before starting the scanning process.
You can also add pictures by pushing the Add Picture button. This helps store as much information as possible and can help the Spentys designers to have a better visualization of the scan and the environment in which it was made.
You can practice on a demo scan to perfect your modeling skills by generating a random scan when you click the Demo Scan button.
The quality of the scan is crucial to provide a perfect-fitting orthosis. Here is a tutorial on how to create the perfect scan.
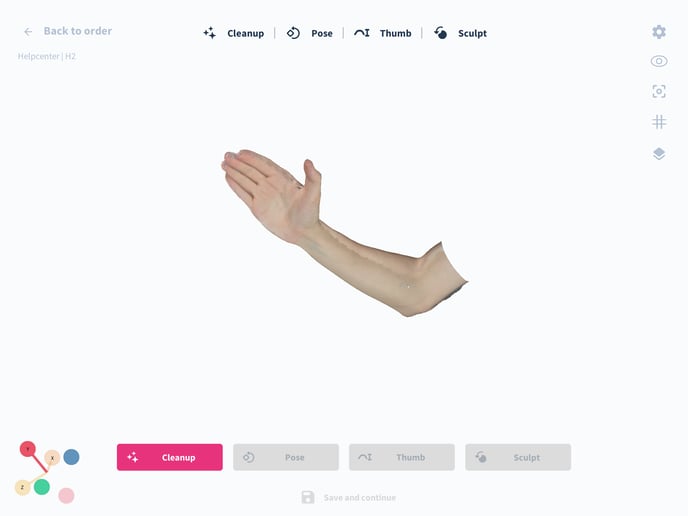
Step 4: rectify the 3D scan
To create perfect-fitting orthoses, it’s recommended to start by rectifying the scan. By doing so you set it up for a smooth modeling experience. Rectifying the scan consists of the following easy steps:
- Cleaning up the scan: If there are irregularities or missing pieces to the scan, you can use our AI tool to fill and smoothen the scan.
- Pose of the scan: This comes in handy when you could not scan the body part in the right immobilization position.
- For some models, you’ll be able to change the dimensions of specific body parts. E.g. the H1 model allows you to adjust the dimensions of the thumb to fit the patient’s measurements.
- Locally sculpt parts of the scan to add or remove volume, creating or removing pressure points.
Here is an article that explains all the steps in more detail.
Step 5 : Selecting material and print options
To help you better visualize how your orthosis will look like, you need to select the material you would want to print in. Depending on where you want to print, you have options for different print technology.
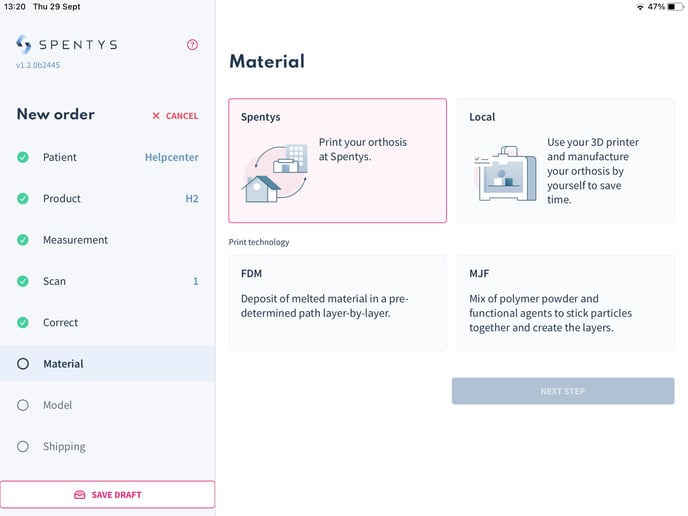
If you choose to print it at our facilities, you can select the print technology as well as the most adapted material. You can find more information on material choices here.
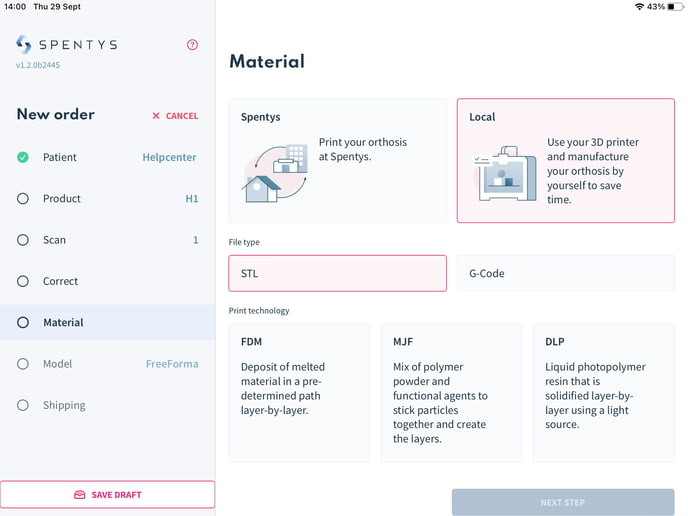
Local
If you choose to print it yourself, you can choose to download the file in G-Code format or in STL format.
Step 6: Modeling the device
You can ask a Spentys designer to model the orthosis for you or model it yourself with the FreeForma, FastForma or the AutoForma tool.
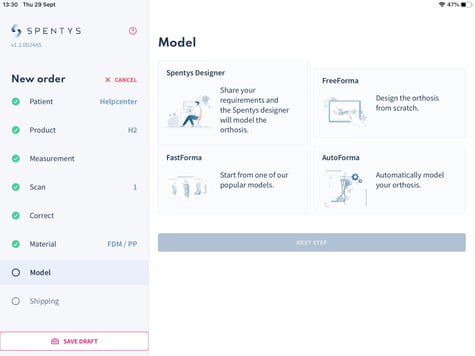
Spentys designer
If you select this option, the scan and information will be sent to one of our designers. You can include a review model to check the model after it has been designed. You can also add more information about the orthosis and its closing system.
FreeForma
Design your orthosis directly on the iPad in 3 easy steps:
- Create the shape of the orthosis by drawing on the limb.
- Decide on the local and overall thickness of the orthosis.
- Add a closing system to your design.
Here is an article that explains all the steps in more detail.
FastForma
Design your orthosis in less time with two easy steps:
- Add landmarks to the joints of the limb
- Add beltloops
Here is an article that explains all the steps in more detail
AutoForma
This tool helps you create the orthosis automatically without drawing. Simply add landmarks on the limb and allow the algorithm to generate the orthosis. To learn more about this tool, click here.
Step 7: shipping
Set the date of the consultation with the patient, the date when you wish your orthosis to be sent as well as your invoice address and shipping address.
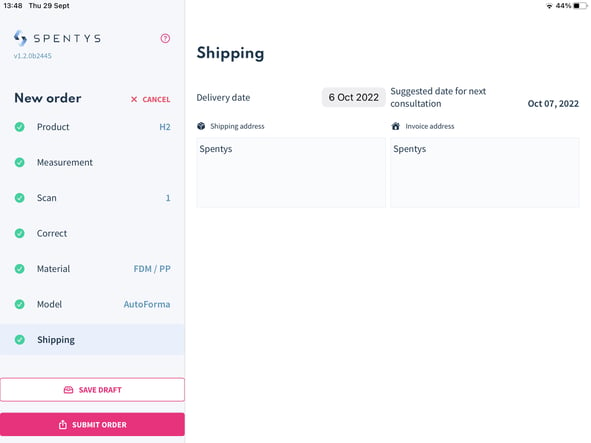
Congratulations! You have just created (your first) new order. You can now decide to save the draft in order to edit it later or you can choose to submit an order and your order will be visible on the platform.