
Add or remove local volume to the scan, using the sculpt tool.
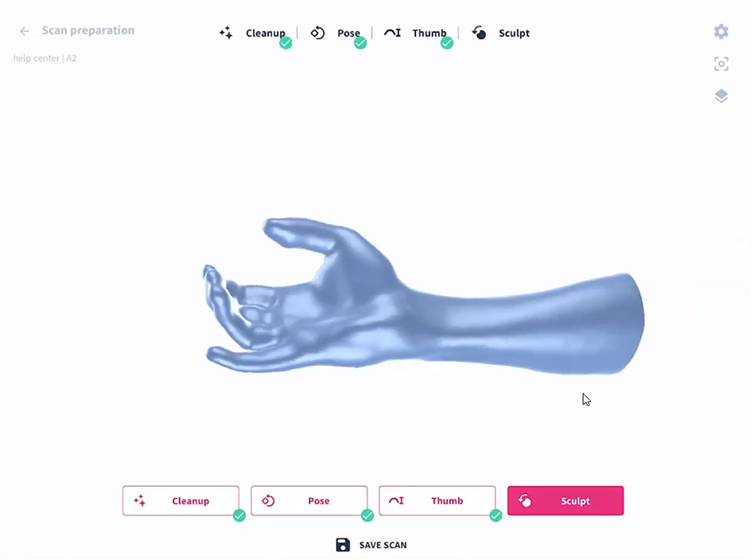
To start sculpting, click on the sculpt button on the bottom of the screen.
First, let’s explain all the different features the app offers to start sculpting.
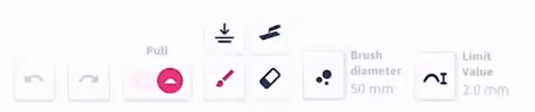
- Undo / Redo buttons : To go back and forth your steps of drawing
- Pull/Push Slider: switch from material creation mode to material removal mode
- Tools:
- Brush: Normal sculpt mode to make local offsets
- Flattening: Make your surface flat
- Average: put all the volumes around the center of your touch raise to the center
- Eraser: Erase locally in the scan the modifications you made
- Limit value: set a quantified deformation limit
- Brush radius: Change the diameter of your brush
In the bottom-left corner of the screen, you can find four orientation commands. They automatically reorientate your scan in a certain position.
In the bottom-right corner of the screen, there are a quit button and an arrow. Use these to go back and forth between steps. Be aware that changes won’t be saved if you go to the previous steps!
If you want to create pressure zones you can swing the slider to the "Push" side.
On the contrary, if you want to create discharge zones, switch to the "Pull" mode.
You can choose the depth of the volume you want to add or remove via the Limit Value slider and start to draw on your scan.
Also, you can use the flattening tool to make a flat surface, or the average tool to push all the volumes around the center you decided.
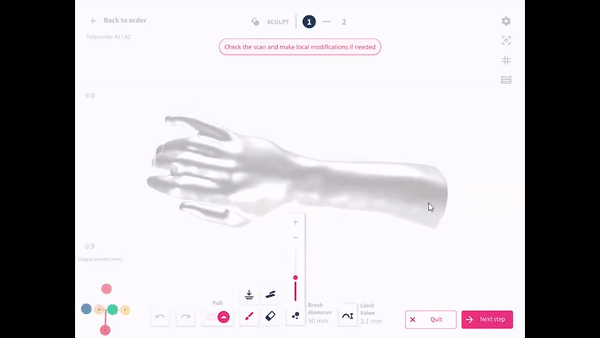
This is the last step of rectifying the scan. Once you are satisfied with your modification, click on export to return to your new order. Now you’re ready to model the orthosis!