
You can access the FreeForma tool while creating a new order for your patient. This is how to create a new order for your patient.
Model
If you wish to design your orthosis yourself, from scratch, choose the FreeForma option in the model step of your New Order.
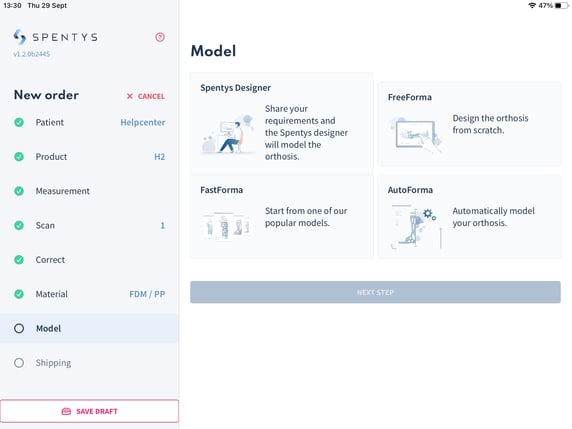
FreeForma
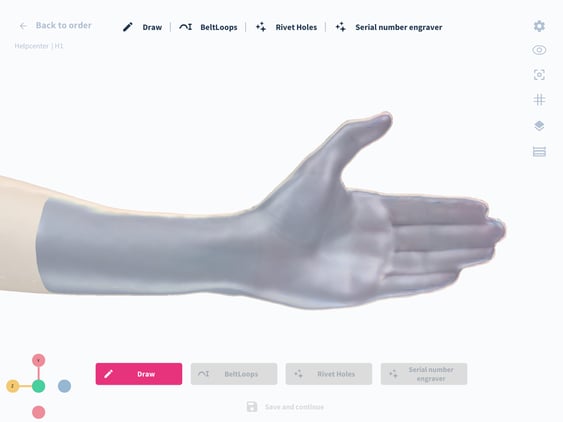
The menu of the FreeForma consists of three steps: Draw, Beltloops, and Engrave.
You can change the scan orientation by sliding over the screen with one finger in the direction you want to turn the scan. You can also use two fingers to zoom in and zoom out by moving your fingers closer or further from each other on the screen. You can also reposition the scan by dragging two fingers over the screen.
To complete the modeling process, follow the instructions that will appear for each step at the top of the screen.
Step 1: Draw
Design your orthosis
Start designing your orthosis by clicking on Draw:
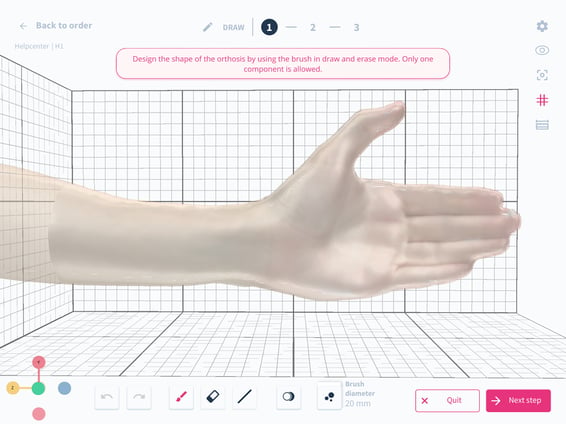
At this stage, you can start designing your orthosis. Different tools are available to do this at the bottom of the screen:
- Orientation commands. They automatically reorientate your scan in a certain position.
- Undo and redo buttons.
- Brush/Eraser: with those two buttons, you can go from paint mode with the brush (where you can add surface on which you want to create the model) to erase mode in with the eraser (where you can remove surface to, e.g. Create perforations for better breathability or remove parts that you colored by accident).
- Straight line tool: Draw straight lines from point to point anywhere on the limb.
- Transparency: Make your scan transparent so that you can see your drawing through it
- Brush size: use the slider to change the width of the brush. The exact size of the brush is indicated in mm inside of the panel. On its right side, there is a circle with a brush inside, which functions as a visual indicator. The size of the circle corresponds with the brush size of the slider.
In the panel at the top right side of the screen from top to bottom :
- Settings: View order details and controls
- Opacity of scan: Adjust the opacity of the texture scan with the slider.
- Centralization button to position your model back in the center of your screen.
- Measuring tools:
- The distance tool: measure the distance between any two planes. You can change the distance by sliding the planes over the model.
- The circumference tool: measure the estimated circumference at any location on the scan. Slide the plane over the model to get to the location where you want to measure the circumference.
- The length tool: you can add two points (a distal and proximal point) to the model to estimate the length between these points. There will be a differentiation given between the surface length and the direct length.
In the bottom-right corner of the screen, you have the option to quit or go to the next step. . Be aware that changes won’t be saved if you go to the previous steps.
In the top-left corner, you can click on the “Scan preparation” to go back to the order.
Your paintbrushes will seem a bit rough but do not worry. the Software will automatically smoothen it out once you go to the next step. Proceed to the next step when you are finished.
The thickness of the orthosis
In this step, you can adapt the thickness for your orthosis, depending on your patient's needs. Use the plus and minus buttons in the panel on the right side of the screen to change the thickness.
- You can change the overall thickness of the orthosis by selecting a material in the Material Selection button at the bottom of the screen or by choosing the value in the Thickness slider and then tapping on “Set Globally”, which will apply this thickness to the entire orthosis
- You can also adapt local thickness by drawing on the orthosis with your fingers after selecting your value in the Thickness slider.
As shown above, you can decide to add extra thickness to the wrist. Extra thickness leads to extra support and rigidity.
Proceed to the next step once you have successfully defined the different thicknesses of the orthosis.
Boundaries thickness + flare
You can also choose the thickness of the boundaries of the splint. Next to that, there is also a 'flare' option for the boundaries. This can improve the aesthetic aspect of the splint for example.
Step 2: Closing System
Beltloops
In this step, you can add beltloops to the orthosis you have just designed.
- Click on "+" if you wish to add a belt loop.
You will get the possibility to choose between several options:

- Rivet hole: Select the area where you'd like to place a rivet hole. once the location is indicated you'll have the possibility to choose the size of the rivet hole.
- Mushroom pin: The mushroom pin is an alternative for the rivet hole, that can be implemented on the design of the orthosis. Once the location is chosen, you'll have the possibility to decide on the size of the pin.
- Beltloop: This is a 'free' beltloop and can be placed in the area of your choice. Once the beltloop is place, you'll have the possibility to change the orientation of the beltloop as well as the clearance, thickness and length.
- Slotted hole: This is an internal beltloop, a slot/hole in the orthosis, that can be used to make the device less bulky. It is important to know that this is not a solution for every patient, since the velcro/strap would be in contact with the skin of the patient.
- Minimum length of 35mm
- Minimum clearance of 4mm on a flat surface. If the surface is curved, the clearance must be more than 4mm.
- Minimum thickness of 5mm
Step 3: Engrave and export
If you are satisfied with your orthosis, you can now engrave a serial number on it and export it to your new order.
Once you have clicked on the start button, you'll have the possibility to chose the text that needs to be engraved (max 11 characters long). You can then move this serial number on the orthosis by sliding it with your finger and repositioning it using the two rotation arrows.
You can press on validate, to save your orthosis and export it.
Once you have exported it, you will automatically be brought back to your new order. Beware, as of now, once you have exported your orthosis, you cannot further edit it.
Congratulations, you have just successfully created your orthosis!