
The rectification tool lets you modify the scan in order to better adapt it to your patient’s characteristics and pathology. In this article, we will go more in detail on the rectification of the wrist.
After creating a new scan, you can rectify the scan. If it is your first time using the app and the first time you will try to rectify a scan, we recommend reading this article first where we explain all of the steps and tools in more detail.
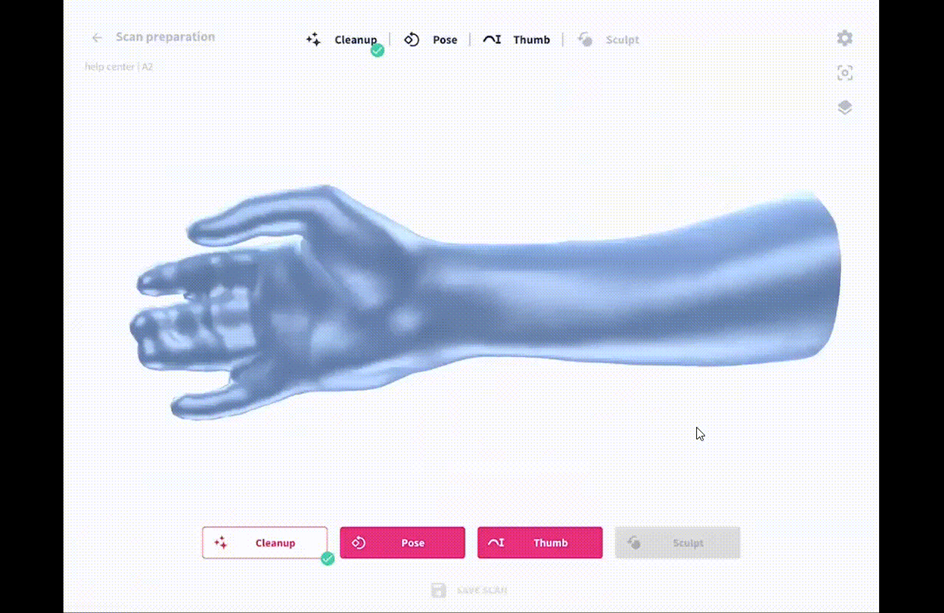
Step 1: Clean-up and add landmarks
The first step of the rectification process is to automatically smooth out the scan and fill up missing spots if needed.
The part you select will get colored in green. Pick the part you want to use to create the orthosis. If it’s red then it has not been selected.
Next, you should position landmark points. A reference model in the lower middle part of your screen indicates precisely where you should put the landmark points. Try to be as precise as possible, especially with the ‘Wrist Crease Center’ landmark. The app will automatically indicate that landmark as its pivot point to adjust the position of the scan in a later step.
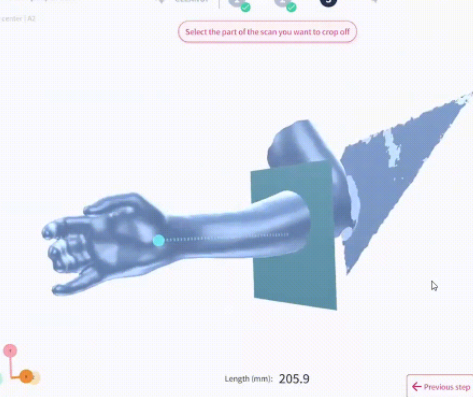
| Now, select the part of the scan you want to crop off.
To do so, simply drag the square that will do the section with your fingers. The distance between the point on the wrist and this square will be indicated in order to optimize the length of the brace.
|
 |
Step 2: Positioning
The next step is Pose. Here you can change the position of the scan.
First, position two more landmark points. One on the ulnar styloid and one on the MCP crease (as shown in the clip above).
Once you’ve positioned these landmark points, you can adapt the angle of the scan. In this example (see image below), we adjust the flexion-extension and abduction-adduction of the wrist, depending on the needs of the patient and their pathology.
To make these changes, simply activate the two sliders at the bottom of the screen to access the gradation of your flexion/extension or abduction/adduction.
If you wish to go back to your initial scan position, you can slide the scale to return to 0°.
|
Remember, try to position the hand as neutral as possible in the frontal (abduction/adduction) plane. Moreover, depending on the purpose of the splint, position the wrist in different degrees of flexion/extension (sagittal plane). E.g.:
|
 |
Step 3: Sculpt
The last step in the rectification process is the possibility to add or remove local volume to the scan. For a more detailed explanation of how to use the sculpting tool, we suggest reading this article.
To start sculpting, click on the sculpt button located at the bottom of your screen.
Located in the hand and wrist there are some area’s which are more prone to pressure points and should be kept in mind when sculpting, more specifically:
|
 |
Every patient is unique and will not necessarily need sculpting on all the mentioned points. Always check your patient's limb to make sure where their specific bony structures are located.
Most of the time, the ulnar styloid will be the only structure where to add extra volume when rectifying the wrist. With the paintbrush, you will be able to create/select the region you want to add extra volume. After selecting the region, you can choose the depth of the volume you want to add (3-5mm indicated).

Tip: Even when you decide in a later step (modeling) to not implement the styloid in the model, we recommend adding the extra volume just to exclude any possibility of adding pressure to the styloid.
Congratulations! You are becoming a pro at preparing scans.