
Here is a step-by-step guide that will help you to achieve your first order after your onboarding with Spentys
- Enter the patient’s name: Jane, age 45, pathology artritis and other important information.
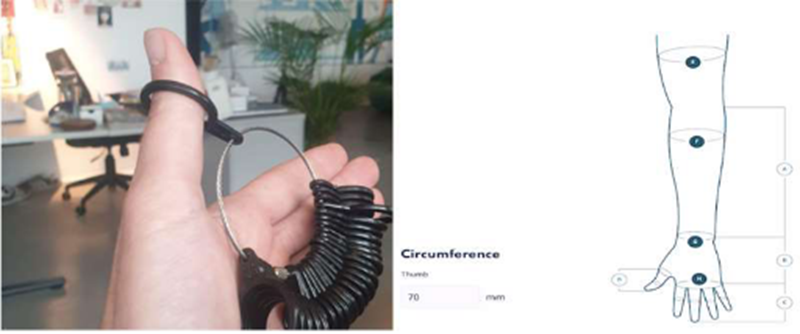
- First select the right upper limb you would like to immobilize. To design a H2-splint you will need to select the thumb and the hand. After selecting the segments, you will be able to select the desired splint.
- Enter the circumference 70mm as the IP-articulation of the thumb. This is to ensure that the opening is large enough to go into the splint. You can measure the circumference with a ring sizer.
- Before scanning the patient, remember to have enough space around the patient and to make sure you have enough light to make the scan (BUT avoid scanning against bright sunlight). Tip: the pinch pose is a good position for immobilization.
- Scan the right arm.
- Crop the scan to 100mm. Rectify the position of the wrist to neutral and in the second step to 5 degrees dorsal extension and 5 degrees of ulnar deviation. Add 2.5 mm offset on the ulnar styloid.
- Select Spentys as the production center and MJF TPU as the printing method
- Select modeling in AutoForma:
- Click on ‘fit’ and place the landmarks on the indicated areas.
-
- Once the template is fitted on the scan, make sure the ulnar coverage is on ‘medium’ and the radial coverage is on ‘short’
-
- Use the controlled details button to smoothen the sharp edges if necessary
-
- Create 2 beltloops, to make sure the splint is secured around the hand.
- Place the serial number on the base of the splint.
- Make sure the splint has 3,5mm as the global thickness. Make there is a 1,5mm global offset.
- Enter the shipping/invoicing address.
- To complete the order, press the ‘submit order’ button. You will be able to access the order on the platform.
Congratulations, you just created an H2 model in AutoForma.